Thursday, February 26, 2015

a bit o' green stitchin' for ye


GREENS are the DEAL next week--
just $6.99 per yard
So...I traveled the Internet machine --looking for FREE and what I thought kinda nice projects for MARCH--specifically St. Patrick's Day--that could be finished in the "wink o' a leprechaun"!

Click each picture to go to tutorial!


http://www.pieceandquilt.com/2015/02/how-to-clover-quilt-block-tutorial.htmlNatalia Bonner's 12" shamrock block--just a few blocks would make a great table runner or throw--BONUS: She also gives directions for 18" and 24" BIG BLOCKS. JUST 1 Big Block with a Border makes a wall hanging or table topper. 
 

http://theinboxjaunt.com/2014/03/04/the-irish-chain-a-lucky-free-motion-quilt-tutorial/   


I love free motion quilting!  I can hardly wait to try Lori Kennedy's Irish Chain free motion stitching!


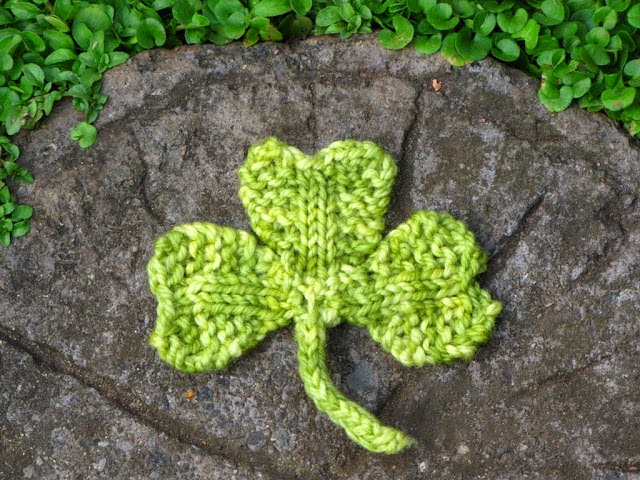
http://www.naturalsuburbia.com/2012/03/shamrock-clover-knitting-pattern-for-st.html 


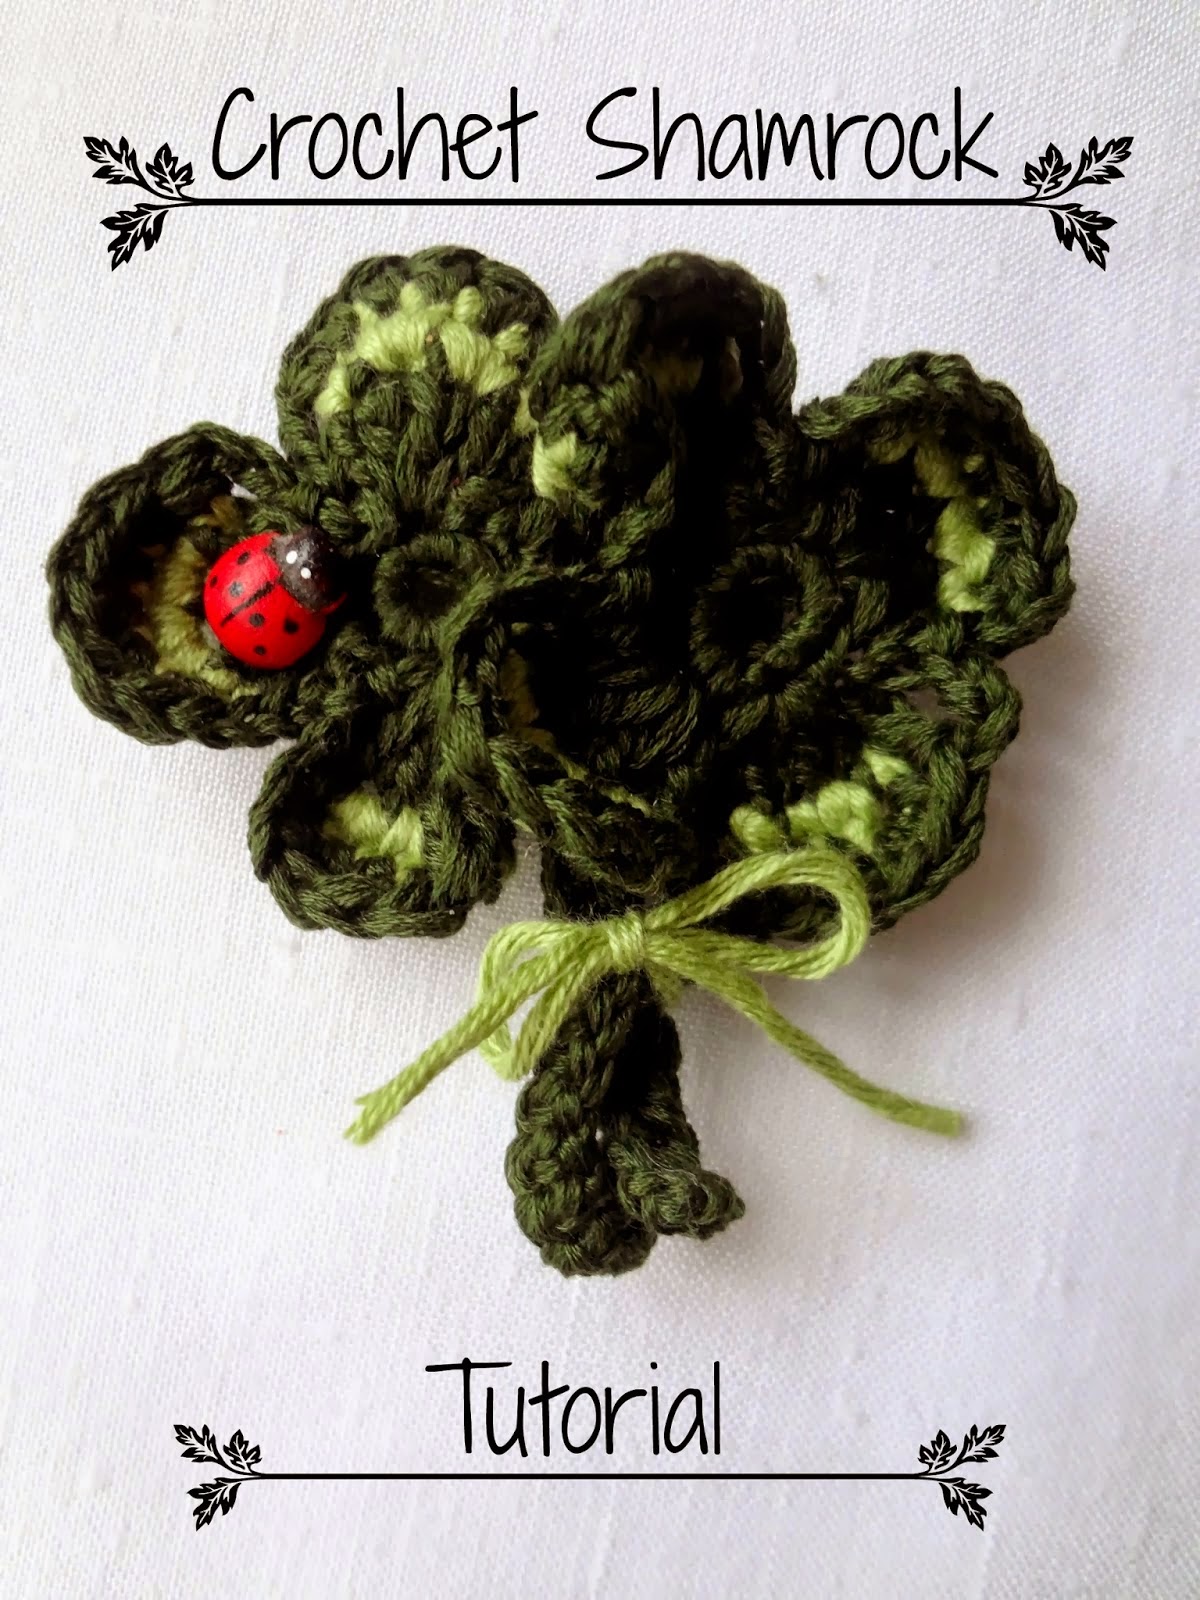
http://thelittletreasures.blogspot.com/2014/03/crochet-shamrock-tutorial-free.html 
Many of you also knit and crochet--Here's a couple of quick little shamrocks to embellish bigger projects or notecards or make them into a pin or barrette!


http://bbpaperandink.blogspot.com/2011/03/shamrock-barrette.html 
OK--In a hurry?  Here's one that will literally take you less than 2 minutes!--Add a little button or stitches for some pizzazz!


Thursday, February 19, 2015

Shortcuts to Free Pattern Land!


 (If you clicked the last 2 before 5pm Thursday--Links were broken--should be all fixed now-- )

Traveling through the World Wide Web--I found a few pattern downloads for new fabrics we have at the shop--Just click on the "CLICK HERE"  for a shortcut to each pattern!
 Besties Forever and Snuggle Buddies are both from Quilting Treasures and coordinate fabrics are interchangeable--and of course we have many other fabrics in colors and patterns that would match well!


CLICK HERE   for Besties Forever pattern


2014/12/05/files/Besties_Forever_PINK_B2C.pdf


Well--time has run out for today--I hope to find more in the future
--Cindy--

Thursday, February 12, 2015

On the Border...

       "Border Prints" Not Just for Borders!

It's time to revisit BORDER PRINTS--
A while ago we shared this easy child's quilt made with a border print and a backing--that's it!  Border prints look great used for a "row" quilt like this!
      Cut a border print as a PANEL--add borders
with or without corner squares to make another quick gift for someone sweet.
      Some quilter's enjoy getting creative with  free motion quilting as much as or more than piecing--Spending LESS time on piecing means you have MORE time for machine quilting to make it special!

And of course--Border Prints are great for...well, BORDERS! Make it easy by doing just top and bottom borders with special strips--add a print for side borders.  
*Here are 2 examples using printed borders for top and bottom(2 different borders from the same bolt!)

   After cutting the borders--the fabric leftover will make cute coordinating bibs and burpcloths--or incorporate into blocks of the quilt.
    We used  our "Simply Rails 'n Strips Pattern ($3) -- using 12 blocks and a border for one of the quilts..


Here are border prints you will find at The Dusty Attic!
Keep Scrolling--after making my fancy collage--I decided to look for more border bolts--then after THAT picture I found ONE more cotton border and ONE more flannel border


Thursday, February 5, 2015

Not Your Cup o' Tea?

We all have Fabric in our stash that we find and say...
"What was I thinking?!"
Maybe somebody gave it to you--and you say...
"What were they thinking?!
What to Do, What to DoHere's a little brainstorm--
 SO... I'm thinking about next week's
 $2.99 is cheaper that Muslin---
$2.99 is cheaper than the cheap white flannel--
 $2.99 is cheaper than the batting--

Come check out the Mystery Deal next week and 
pick up a few yards of "BARGAIN'!
Even if...
 What you see...
is not your...

Thursday, January 29, 2015

Treat a Friend! Make Her a Mug Mat! Tutorial

These oversized coasters are easy to make! We actually have a SEW SIMPLY laminated pattern for this cute project in the shop but we want to treat you to a free tutorial today!  These would make special little "Valentines" for friends, mothers, sisters, teachers, even grandchildren! 
Project can use leftover Pre-Cuts from other, bigger projects!

WHAT YOU'LL NEED:

You can use leftover charms, jelly strips or cakes!

Fabric A:  5" Square (Charm)
Fabric B:  3 1/2" x 5" (from a charm)
Fabric C:  2 1/2 " x 8" (from a jelly)

Backing: 7 1/2" x 8 1/2" ( from a "cake")
Batting   7 1/2" x 8 1/2"

Here We Go!--All Seams 1/4"

  Stitch A-5" Square to B-3 1/2" x 5".   Press seam to side
 

  "Square Up" to 5" x 8"--1st Unit

Stitch C Strip to 1st Unit.   Press seam toward Strip.
"Square Up" to 7" x 8"

 Lay Down Batting, Then Backing--RIGHT SIDE UP
Lay Mat Top RIGHT SIDE DOWN
PIN Layers together **Backing is a little wider than top
     

Mark an opening along the side about 3" (for turning)
See Below
Mark 3" Opening

Be sure to backstitch at beginning and end of  stitching layers together to hold secure when turning right side out.
Beginning at one "Opening Mark" --Stitch 1/4" around the edge of the TOP (NOT the edge of the Backing).


Pivot at Corners and STOP at 2nd "Opening Mark" 
Be sure to STOP and leave opening Free!


 Trim Seam edges--I like to make the edges a little uneven for a smoother finish when turned.

Clip all Corners--BUT be careful not to cut stitching!


*Happy Hint for you!
(I just figured this out about 2 years ago--it only took me about 45 years of sewing!)
BEFORE you turn your "sandwich" right side out--press around stitching to set seams--THEN Press down the free edges of the opening to make a crease even with the stitching--do this on FRONT and BACK.
Pressing will make the edges stay inside and make stitching the opening easier--
Turn Mat RIGHT Side OUT--Almost finished!
Use a "Purple Thang" or Knitting Needle or Crochet Hook
 or whatever you can get your hands on -that's not too sharp- to poke the corners out and I like to run the point along the seams on the inside so they don't "fold in" when you press.
Press around edges
Slipstitch to close opening OR...
...stitch around very close to the edge!
Topstitch 1/4" around all seams 
OR PRACTICE Free Motion Quilting--woohoo! 


   We hope you'll enjoy making many merry MugMats!
If you'd like a printed pattern--a simple laminated Mug Mat pattern is available at the shop for just $3!
Happy Sewing!
Cindy

Thursday, January 22, 2015

Just Spoolin' Around!


http://lrstitched.com/2012/01/06/tutorial-spool-garland/
     
Hello!

 My Travels through Internet Land led me to this sweet garland.  It looks like this is the reason I have been saving my empty spools for about 8 years!  
It's so very easy and Lindsey Rhodes at LRStitched has published a beautiful tutorial.
Click Link Above!

Thursday, January 15, 2015

Cover that webbing! Make a belt!

Here is an easy way to use plain, BORING webbing to make a pretty belt that is adjustable-- OR Use the "Covering" directions to make sturdy Tote Straps that won't stretch!
Supplies Needed:
(2) 1" "D" Rings

1" Belt webbing: 
-- measure around "you" where you wear a belt and add 8"
    (most people where belts a little below waist--)
   example: If you are 32" around (I wish!) cut webbing 40"

3" strip of fabric  
  (piece together if necessary)  2" longer than Belt webbing: 
  example: If webbing length is 40", then 3" x 42" fabric strip
* It is possible to use 2 1/2" strips but you will have to be very careful when sewing!

1. Press under 1/4"  LONG side of fabric strip
2. Press under 1/2"  Both NARROW edges.
3. Pin webbing to center of wrong side of strip--
placing narrow 1/2" fold OVER the webbing on one end
4. Folding in raw edge first, then pulling over the 1/4" folded LONG side of fabric strip--Stitch across one narrow end securing webbing inside the fabric strip.


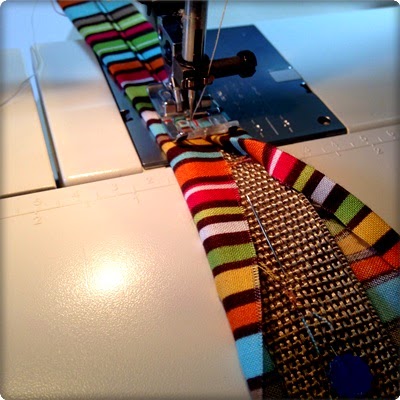
5. Folding in raw edge first, pull over the 1/4" folded long edge and Stitch down the middle of the webbing--removing the pins as you go--(Some may want to pin the folded fabric in place before stitching)
6. When you come to the bottom of the webbing you will have about an inch or so of fabric extra with another 1/2" fold:
  Finish stitching to the end and th ensew across narrow end as you did in step 4--
--there will be a short segment of belt with no webbing in it :)

7.  Topstitch down the length as many times as you want!
8. Take the flimsy "fabric only" end and slip through 2 D rings as shown--D rings should be next to webbing with the thinner end of fabric folded over (See! less bulk when sewing on the D rings!)
9. Stitch across end of belt as shown below--then stitch across again as close to the D rings as you can get!

10.  To Secure Belt: Thread plain end through BOTH D Rings and then back over through just one.

You can thread the Belt End to the Outside  and slip end through a belt loop or  thread it on the inside for a neater look!-